Molds are the most important thing in resin casting. Molds are used as the base for shaping the resin and get the final result.
The preparation of molds is a daunting experience. So, why people love making their own molds instead of shopping them online?
Well, doubtlessly market has the countless options in molds that you can buy. You can easily go and get anyone you need.
Here we a few reasons that will clear your thoughts about how making your own molds is beneficial!
Benefits of Making Molds
- You get a lot of margin to be creative rather than using the same molds in the market that everyone using.
- It will costs you less
- You can make it flawless; market products can have rough surface or mistakes
Things You Need For Making Molds
- Base material (plastic, silicone, epoxy, rubber, polyurethane)
- Mixing cups
- Mixing stick
- Hot glue gun
- Gloves
- Model item
- Wood board
- Medalling clay
- Model item
Process of Making Resin Molds
Regardless of the material type, the resin molds making process is almost the same. Here are a few basic steps you need to follow to achieve your required mold.
Let’s begin!
1. Frame Construction
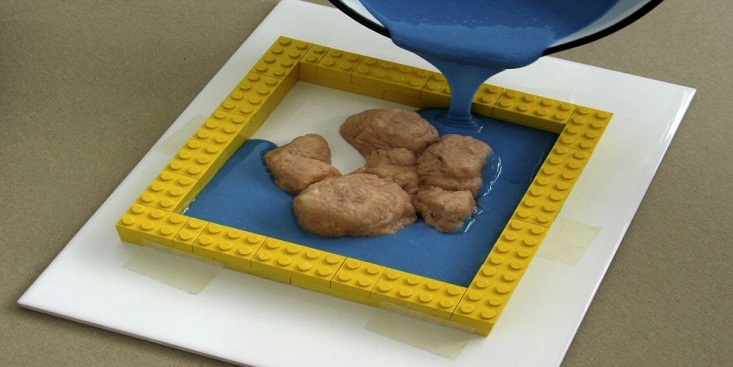
The frame is required for casting of mold. Usually, people construct their own unique frame according to the shape they want. Other than glass, you can use any material to construct the frame like wood. Ensure to enclose all the leaks and holes in frame before putting the mold material in that.
2. Preparation of Base Material
The mold material needs to be prepared by mixing that with resin. You should carefully measure the ratios of material mentioned on the box.
While preparing the material ensures that no bubbles or clump formed. Mix the small amount in separate cups to avoid clumping.
3. Pouring the Material
After preparing your material, pour the material into your frame. The frame should be properly closed from all sides. If the frame is made from some sticky material like wood, apply a releaser like oil.
4. Let the Mold Solid
Leave the mold to cool down so it get solidify. Based on the material type, solidification takes 1 hour to about a day.
5. Removal of Mold
After checking the solidification of mold, carefully remove the mold from frame. A flexible mold is easy to remove rather than the hard one. Be careful about the mold breakage or damage.
Some Tips and Tricks
While preparing the mold, there are a few tips and trick that will help you getting the flawless results.
- Clean the surface properly from all the particles that can cause the roughness in mold.
- The frame surface should be smooth and leveled.
- Carefully choose the model design that you can prepare well.
- Don’t mix the large amount of material at once.
- Be careful about the temperature requirements that your material needs. Low temperature can make material thick which makes pouring difficult. High temperature will take make the solidification difficult and time-taking.
- Silicone is one of the most harmless and best materials that you can select for molding.
Conclusion
This article contains all the important information that you need to know to make amazing molds. Molding can be a scary process if you’ll be careless or messy. However, following the right direction will make it fun and exciting.


